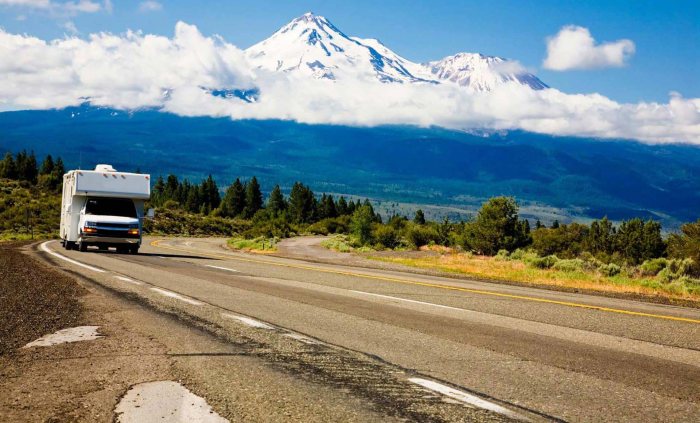
Is Full-Time RVing The Right Lifestyle For Me?

gorgeous

You are probably wondering, since you clicked on this article, what it is like to live in an RV full-time as your only residence. You’re trying to find out if it’s right for you. Of course, full-time RV life is not without its issues. There’s still the mundane tasks of everyday ‘normal’ life. There’s no escaping certain chores, no matter how you choose to live. There are also going to be new challenges to be had. Let’s take a look at some of the challenges that might dissuade you from living as a full-time RVer. ‘Life’ doesn’t stop because you live full-time in an RV. You’re still going to have to do stuff you don’t want to do.  Of course, you still have to do chores like run errands, pay bills, make dinner, and clean ‘house’. You know, everyday life stuff.

How will you earn money? How will you choose where to go? Will you need good cell reception for internet? Are you going to have solar for power or a generator? How will you find water and sewer dumps? It’s a little more like caveman living. You will have to ‘hunt’ for these things! 😂 (Full disclosure- I have done it on my own, but now my traveling partner does most of the work of finding these things!)

The good news is boondocking is almost always free, you get way better views than in a campground, and you have much more privacy and peace and quiet. This may be a major factor in your decision. It can make or break living the lifestyle for some. Think about if you are the type of person who likes these types of challenges of if you prefer a more ‘luxe’ lifestyle. If you’re ‘luxe’, you may be a campground/stick in one spot kind of person. Also, keep in mind that the more expensive campgrounds are going to be the nicer ones. If you want ‘luxe’, you will be paying a very high price for it.

8 Tips For A Happier Camping Pet

dog-panting

Your pet is going to have their own idea of how much they like or dislike your imposing a move or trip on them. What we can offer here are ways to help them acclimate to their new situation.

1. Keep Things Familiar

Your pet usually has a schedule at home. A food schedule, walking schedule, a time that you come home, entertainment time and so on. When you go on a trip, try to keep some of that schedule the same. Bring the things they use from home such as their bedding, food and water bowls and any toys that they like to play with. Make an effort to feed them around the same time you usually do at home. ​This isn’t rocket science, but it might not cross your mind until it’s too late. Your pet(s) will appreciate your keeping some things familiar to them. Your payback just might be that they don’t bark or meow incessantly. They will also settle in faster.

2. ​Exercise Your Dogs As Much As Possible

Dogs need stimulation. The best stimulation you can give them is a structured walk. No, we don’t mean taking them out to a dog park and letting them run around with crazy energy. This is akin to letting kids out to play at recess. When they come back in, they are even MORE wound up than they were before recess. Dogs need a mental challenge and a structured, calm, LONG walk is the #1 best way to achieve this. It will get you off of the couch at the same time. What are you doing on the couch on a camping trip, anyway?

3. Don’t Put Them In Your Trailer While Driving​

We understand that not many dog or cat owners out there use a harness/seat belt for their pets when in transit. This was going to be our #1 recommendation, until we saw a video about how many of them fail. We still believe the car will be safer and more comfortable than in your trailer. Why not in the trailer? First, you aren’t there with them so their fear factor is likely to rise​. To them, they are riding alone in what to them could be a building having an ongoing earthquake. They don’t know what’s going on really, so why throw them back there to be alone and scared?

4. Watch Where You Leave Them

As you hopefully are already aware, most RVs can quickly get hot in the sun, much like a car can. If you are camping in an RV park, and you have your A/C on, be aware that the power can shut off without notice, leaving your pet(s) in a very deadly situation if your windows are all closed and it’s a hot sunny day. What can you do to prevent disaster for your pets? ​First, never leave your windows closed and fans not running if the temperatures are going to be even as high as the low 70’s. You should have a good idea of how quickly and how much hotter than the outside temperature your rig gets before you ever leave your pets in your rig at temperatures over 70.

5. Get Them Ready

If you never take your cat or dog in the car for trips, it’s a very good idea to acclimate them to the motion and feeling by taking short trips before your big one. Start with a simple around the block drive. Don’t get all excited before asking them to get in the car, stay calm and assertive. Praise them if they are behaving properly but don’t get too overzealous about it. Once they realize the car isn’t going to kill them, start extending the duration of your trips. Treats may help them learn to associate the vehicle with positive things, but only give the treats when they are being calm, not if they are shaking or are barking/hiding.

6. Bring Their Medications And Vaccination Records

This may seem like another no-brainer, but people do forget these things. If your dog or cat needs a daily medication at home, he’s going to need it on the road as well! Don’t forget these items. It’s just a good idea to have their vet records as well. Don’t want to haul the paper? Scan it into an app on your phone.

7. Get Them Microchipped

If you haven’t done this already, now is the time. If your pet gets out and runs away, their collar with name and phone number is their best friend. However, if they lose their collar somehow or you had it off, say to give them a bath, then the chances of you ever getting them back is extremely low. Microchipping will be the only hope if someone finds your pet and takes them to a vet to see if they are microchipped.

8. Be A Good Neighbor

Let’s be honest. If you have a dog  that you KNOW barks incessantly when you leave, you shouldn’t be bringing them  with you to an RV park if you plan to leave them in your rig. It’s just totally inconsiderate.


How to Park an RV

f684jftyjty

You’ve finally made it to the campground. But before you can run off to the lake or go for a hike, the first order of the day is to park and level your RV so that your refrigerator will operate properly and you don’t find yourself in bed at night with your feet higher than your head.

Never assume your site will be flat or level. That would make parking an RV too easy. Due to the nature of camping, chances are higher that your site will be rutted, gouged and somewhat uneven.

But don’t fret. You can still get your RV into your spot, and leveled so it operates properly, with a few easy steps. Here’s how:

How to Park an RV

With many campsites designed to accommodate smaller vehicles, easing your 30-foot long fifth-wheeler or even longer motorhome into some spots can be a challenge.

How to Level an RV

There are several reasons to make sure your RV is level, including proper refrigerator operation and safe slide out extension (if you have them). You’ll also want to stabilize your rig so that it doesn’t sway when you move about inside or in windy conditions.

Many luxury motorhomes and trailers come equipped with exotic self-leveling systems, with hydraulic or electric rams that extend at the touch of a button and level the coach automatically. For rigs without this nicety, leveling blocks or ramps and a small bubble level are required.

Leveling blocks or ramps don’t have to be expensive. They can be as simple as a stack of 2×10-inch boards. Or, you can step up to interlocking RV leveling blocks. Made of high-strength plastic, these blocks are touted as being able to bear the weight of even the largest motorhomes and trailers.

1) With your RV positioned in the site where you want it, place the bubble level on the floor to determine if the unit is level both front-to back and side-to-side. If you have slide outs, extend them now to see which way your trailer or motorhome leans. Then retract them for safety.

2) Next, mark some lines in the dirt in front or back of the tires on the side that needs to be leveled.

3) Now pull your rig forward (or back it up) so that the tires are clear of the lines. Place your boards or blocks in position. If you determine that you’ll need several layers of boards or blocks to get your rig level, build them in a ramp configuration.

Don’t try to force your RV to climb up more than 2 inches at a time.

4) Move your motorhome or trailer up onto the levelers, making sure to keep the tire footprint completely on the boards or blocks. Don’t let your tires overhang any edge as this can cause damage.

5) Now check the bubble level again and adjust the height of the boards or blocks as needed so that your rig is level side-to-side. When all looks good, place wheel chocks in front or behind the tires (depending which way the site slopes) to keep the trailer from moving. You can then disconnect your trailer from your tow vehicle and use the trailer’s hitch jack (or a fifth-wheel’s “landing gear”) to fine-tune the front-to-rear level.

For motorhomes, put the transmission in “park” and set the parking brake.

How to Stabilize Your RV

Now that your RV is level, you’ll want to stabilize it so it doesn’t rock back and forth when you walk around inside. You should use stabilizing jacks to accomplish this.

Note: These should never be used to level a rig, as they weren’t designed for that purpose.

Stabilizing jacks come in several configurations. The most common is the scissor jack, which is usually bolted or welded to the trailer’s frame at the front and rear.

Pop-up tent trailers are frequently equipped with a drop-down style jack, which, as the name implies, drops down from the frame.

To use the stabilizing jacks after you’ve leveled the RV:

1. Lower the jacks following the manufacturer’s instructions. To save time and give the foot of each jack a larger base, slide a couple of short 2×4- or 2×6-inch boards beneath each foot. This is especially helpful if the ground is loose or sandy.

2. Once the jack foot is in contact with the ground, give the crank a few extra turns to provide the trailer a secure footing. Check the bubble level to make sure your RV remains level. Do this for all four corners.

And that’s how to park and level an RV! Your RV is now safely in the campsite and ready to enjoy. When you get ready to leave just reverse these steps, remembering to raise the jacks to their travel position, and collect and store your leveling boards or blocks.

How To Start a Campfire

img5

When you hear the word “camping,” a swirl of pleasant images immediately comes to mind. But perhaps the most iconic is the welcoming campfire.

More than just to ward off the chilly night, a campfire is a place where family and friends gather to lounge and chat, roast marshmallows, or simply stare into the glowing coals and let the mind wander.

But before you can reach such nirvana, you should know how to start a campfire. And really, it’s not that hard…

STEP 1: Gather Your Tools

There’s a bit more to building a great campfire than simply placing a few logs in a heap and tossing on a match. Here’s what you’ll need:

Tinder—the smallest and easiest burning materials used to get a campfire started.

Kindling—the next step up in size. Usually twigs or small branches between 1/8 inch and 1/2 inch in diameter.

Firewood—the crown of an inviting campfire. Firewood can vary anywhere from 1 inch to 5 inches in diameter. It can be whole logs, or split down from larger pieces. It’s important that your firewood is completely dry in order to start easily and stay lit.

Important Note: Don’t break branches off trees for firewood. If everyone did this there wouldn’t be any forests left. Some forest management agencies permit you to pick up fallen limbs but ask first.

Matches or a lighter—how else are you going to get your campfire started? Common stick matches are fine, although gas lighters used for starting BBQ grills are gaining in popularity.

STEP 2: Build the Fire

Before you can start a campfire, you have to build it first.

If your site has a fire ring, you’ll probably have to push the ash and charcoal from previous fires to the outer edge of the ring to give you enough room for the new fire. For ashes that are stone cold, consider shoveling them into a plastic trash bag for proper disposal later.

If you have to create your own fire pit, clear away any dead grass or vegetation for 8 to 10 feet around. You want bare dirt. Then dig down into the cleared soil several inches and set the loose dirt off to one side for use in case of emergency. You can mound the dirt around the sides of the pit to act as a firewall, or place large rocks around the edge of the pit to insulate the fire.

Next, at the center of the fire ring, lay a bed of tinder perhaps a foot in diameter. (Remember, tinder is the really light, quick burning material.)

1. The Teepee Fire: This style is good for cooking. First, arrange your kindling in teepee fashion over your tinder. Then build a larger teepee of firewood over the kindling. When lit, the flames will rise up through the kindling and into the larger wood.

2. The Lean-to Fire: This style is also good for cooking. Start by sticking a long piece of kindling into the ground above your tinder at about a 30-degree angle, with the other end of the stick pointing into the wind. Then lean smaller pieces of kindling against both sides of the longer piece to build a tent. As the kindling catches fire add more, followed by your firewood.

3. The Cross Fire: This is ideal for a long-lasting fire. Start by laying your kindling over the tinder bed in a crisscross fashion, followed by your logs or firewood.

4. The Log Cabin Fire: Another long-lasting fire. Begin by creating a kindling teepee over your tinder, then lay two logs on either side of the cone. Place two more logs on top of these to form a square. Then build up using smaller and shorter pieces of firewood until you’ve formed a cabin. Top off the cabin with some of your lightest kindling.

STEP 3: Light the Fire

Now it’s time to enjoy the results of your labor. Remember to keep children and pets safely away, then light your tinder. For best results light the tinder from several sides. Don’t squirt charcoal lighter fluid into a fire; flames could travel up the stream and burn you. And NEVER use gasoline!

Once your campfire is established, feed it with additional wood as needed, taking care not to build the flames too high. Be sure to keep your fire extinguishing tools nearby, and never leave a fire unattended, even for a moment.

Putting Out Your Fire

Once the evening is over, it’s your responsibility to put your campfire out completely so give yourself plenty of time to do the job right.

Start by sprinkling—not pouring—water onto the flames or coals. Don’t flood the fire ring or pit as you or the next camper will want to use it later.

As you sprinkle, stir the embers with a stick or shovel to ensure that all the coals get wet. Once the steam has subsided and you no longer hear any hissing sounds you’re just about done.

Before you head off to bed or pack up to leave, place the back of your hand just above the wet ashes. Don’t touch them as they could still be hot. Don’t feel any heat? Then the fire is out. If it still feels warm add more water and stir until the fire bed is cold.

With the proper fire ring or pit, the right tinder, kindling and firewood, plus selecting the style of campfire that best meets your preferences, you and your family can safely enjoy an evening under the stars while making s’mores.

Don’t Forget: Safety First

Safety is the most important factor when learning how to start a campfire—especially if you have kiddie campers. A 2011 study revealed that a person is injured by fire every 30 minutes, so stay alert as dancing flames have a magnetic quality that draws people close.


10 Alternatives to the Classic Hot Dog

hot dogs

When someone says “barbecue” you think of the classic meal: A hotdog, a bun, a zig of mustard and a zag of ketchup. Maybe a few onions and relish on top, depending on your preferences.

While the classic hot dog is a campsite staple, it’s not your only option. A few unconventional toppings are all you need to create a whole new meal, or you can choose a different kind of dog altogether. Chew on these ideas before you shop for your next camping trip.

Chili Dog

Pair a traditional hot dog with vegetarian or beef chili for a delicious twist on the classic preparation. What’s better, you can make the chili at the campsite in your Dutch oven and eat the leftovers for another meal.

Chicken Sausage

Throw out the hot dog altogether and nosh on chicken sausage instead. Applegate Farms makes a variety of gourmet flavors like organic chicken and apple sausage, organic andouille sausage and organic fire roasted red pepper sausage.

Chicken Dog

Chicken hot dogs are leaner than all-beef or beef and poultry mix dogs, making them lower in fat and often sodium, as well. Pair your chicken dog with a whole-wheat bun for a healthy hot dog dinner.

Turkey Sausage

If you want to ditch the hot dog altogether, swap it out for a turkey sausage. Cook it over the fire for the smoky, charred flavor that makes campfire cooking so delicious and unique.

Corndog

This childhood favorite is a great hot dog alternative, but don’t buy the frozen version. Instead, make your own right at the campsite.

Vegan Dog

Many shy away from vegan and vegetarian dogs because of their unappetizing and processed ingredients. However, if you choose not to eat meat, but still want to have a dog around the campfire. While some of their ingredients are less than ideal, they pride themselves on using mostly all-natural ingredients like apple cider vinegar and paprika.

Uncured All Beef

An uncured, all-beef hot dog varies in taste and health benefits. An uncured dog has no nitrates, which come from the salts used in a traditional curing process.

Seafood Roll

If you don’t want a hot dog or sausage at all, choose a different protein. With fresh fish and veggies you can still fill a hot dog bun, without having to skip out all together.

Pizza Dog

Ditch the ketchup, mustard and onions for marinara, cheese and pepperoni when you opt for a pizza dog. Make sure to roast your dog on a stick so you still get the campfire flavor that’s so delicious.

Bacon Dog

While this isn’t the healthiest alternative, it’s certainly different from the traditional option. Remember, this hot dog variation will need to be cooked in a pan over the fire so the bacon stays wrapped.


Basic Tire Maintenance for Every Driver

awefaw6e8f4

The tires are the only thing between the vehicle and the road. When they are properly inflated and in good condition, the handling, stability and safety of the vehicle will be maximized. Conversely, when the tires are under inflated, worn out or damaged, all of the safety systems on the vehicle cannot overcome the loss of control that comes with a blow-out or hydroplaning situation. Air pressure in a tire is like oil in an engine; when it is low, the resulting internal damage is unseen until it is too late. Tires naturally lose 1-2 psi per month, so ongoing neglect will eventually result in a tire that cannot support the weight of the vehicle and the occupants. When this happens, the resulting blow-out can result in the loss of control and an accident.

It’s also important to rotate the tires on the vehicle every 5-7,000 miles. Today’s front-wheel-drive vehicles cause the steer tires to wear at a much faster rate than the tires on the rear axle. By periodically rotating the front tires to the back and the back tires to the front, motorists can achieve even treadwear on all four tires and increase the mileage and performance. Failing to rotate the tires often results in the front tires wearing out faster while the rear tires develop irregular treadwear patterns that cause vibrations. The same can be said for alignments. When the vehicle is not properly aligned, the tires will wear out faster which leads to increased operating costs.

Finally, drivers should perform a visual inspection of their tires on a regular basis, especially after hitting a pothole, curb or any type of road debris. Bulges, cuts and other visible damage weaken the internal components of the tire, which can lead to a blow-out. Regular visual inspections will often identify any potential problems before they result in an accident. It’s also a good idea to have the tires inspected by a professional before any long road trips to ensure there are no obvious out-of-service conditions that must be addressed.

Things to know about speeding & traffic laws

home-bg-01

Some roadways are designated as low-speed zones. These include areas with high pedestrian traffic, such as school zones and streets lots of intersections close together. Driving over the speed limit can put you and others at risk of harm.
-Never pass a stopped bus displaying a stop sign to its left. That means children are crossing the street.
-If you hear a siren coming behind you, pull to the side if you can, stop and wait until the police car or fire truck goes by.
-Completely stop at stop signs and look for other drivers and pedestrians before you proceed.
-Obey the posted speed limit at all times. Speeding tickets are costly, and penalties for speeding can include fines, court appearances and loss or suspension of your driving privileges. Also, depending on your insurance policy, speeding tickets can raise your rates.
-When parking your vehicle, always be mindful of handicapped signs, fire hydrants, bus stop zones, parking restrictions for certain times of day, and parking spots that require permits. Just remember to heed all of the signs. Even if you have to circle the block a couple times, it sure beats getting fined or having your car towed.

What to do after an auto accident

download.jpg

If you’re in an accident, first make sure no one in the car is injured. Next, check on the passengers in the other vehicle, pedestrians and anyone else nearby to make sure they’re OK. Then do these five things:
-Stay at the scene. Leaving can result in legal consequences, like fines or additional violations.
-Call 911 or the local police immediately. They’ll dispatch an officer and medical personnel to the scene of the accident. Once the cops arrive, wait for them to complete an accident report.
-If you’re on a busy highway, stay inside the car and wait for the police or an ambulance. It’s dangerous if passengers stand along a freeway or other road with lots of traffic.
-Don’t get into an argument or a fight with the other driver. Simply exchange contact and insurance information. If possible, also get the name and phone numbers of witnesses.
-Call your insurance provider to report the claim. Your agent will ask you for any paperwork you receive about the accident, and will give you important information on getting your car fixed.